I got a Roomba, which is pretty neat, but it’s also pretty stupid. As it turns out, it works better for me if it’s crippled and I’m going to tell you how I did it. And why; I’ll also tell you why.
This is a story about an iRobot® Roomba® 675 Wi-Fi® Connected Robot Vacuum, an array of infrared “cliff” sensors, and a man who is fed up with their bullshit.
I purchased a Roomba because my wife has been begging for one for years, but until now I couldn’t justify the price. At this point, there are so many robot vacuums on the market you can find one to suit whatever your needs or budget may be, but rather than spending time discovering available features and considering my needs and wants, I just bought The Wirecutter’s top-rated model, which is the iRobot Roomba 675.
The Wirecutter advises that you can likely get by with the 614, which doesn’t have Wi-Fi, but I wanted to be able to schedule when it will do its thing, so I paid a bit more. As I write this, Amazon is selling the 675 for the same price as the 614, so watch for those sales!
Long story short, the Roomba actually works better than I thought it would. It picks up a lot of crumbs and dirt, and I can tell from just looking at our living room rug whether it’s been around or not. But let’s not dwell on the positives.
This machine is equipped with four “cliff” sensors along its front edge, which are designed to prevent it from driving right down a flight of stairs or off of… Some other totally normal precipitous residential ledge.
It’s probably just for stairs.
Anyway, these sensors appear to be your bog standard infrared reflectivity sensors, which consist of an infrared LED and an infrared light sensor. Basically it’s a remote control and the part on your TV that “sees” the remote’s light beam, but placed next to each other so that the beam has to bounce off the floor to return to the “eye.”
This is a good choice of component because the parts are cheap and they’re easy to use. The way it operates, based on my observations, is that the Roomba is continually firing off infrared pulses and watching for the returns. If the pulses suddenly go away (or possibly get very faint), Roomba assumes that the distance the beam traveled increased markedly, as it would if the edge of the robot was hanging off the stairs.
Clever!
Also, stupid!
The reason this became a problem for me is that our dining room rug has a dramatic pattern, with areas that are pure white alongside areas that are pure black. You can probably see where this is going. When Roomba passes from a white area to a black area, it affects the infrared light the same way an increase in distance would, since white reflects most light and black absorbs most light.
the net result is that Roomba would frequently end up “trapped” between a black shape on the rug and an actual chair leg, and, thinking that it had nowhere it could go, would sound the infamous “error 6” and turn off.
The only thing worse than an automatic vacuum that requires constant human intervention is the Chrysler PT Cruiser, which I remain absolutely boggled that anyone ever bought, and yet I still see them on the road occasionally and it takes all of my strength not to follow them until they park somewhere so I can ask the owner what, honestly, in the name of all Earthly pursuits, they were high on when they bought it.
I mean really, what is the point of having an automatic vacuum that requires your continuous presence and attention? I want this thing to run at night while I’m asleep, or when I’m not even here. I don’t want to get back hours later and find that it did 12 minutes of work and got “trapped” on a dangerous rug color.
Being the industrious tinkerer that I am, I certainly wasn’t going to let a little infrared beam stop me from building an army of robot servants so that I can sit back and fully enjoy the toil and anxiety of my actual day job without the distraction of trivial household chores.
At first, I figured I could just tape over the sensors. I concluded that the robot needs to see the reflection to know that the floor is there, so I even used aluminum tape for maximum reflectiveness. The robot refused to turn on, complaining that it needed to be moved every time. I took a closer look.
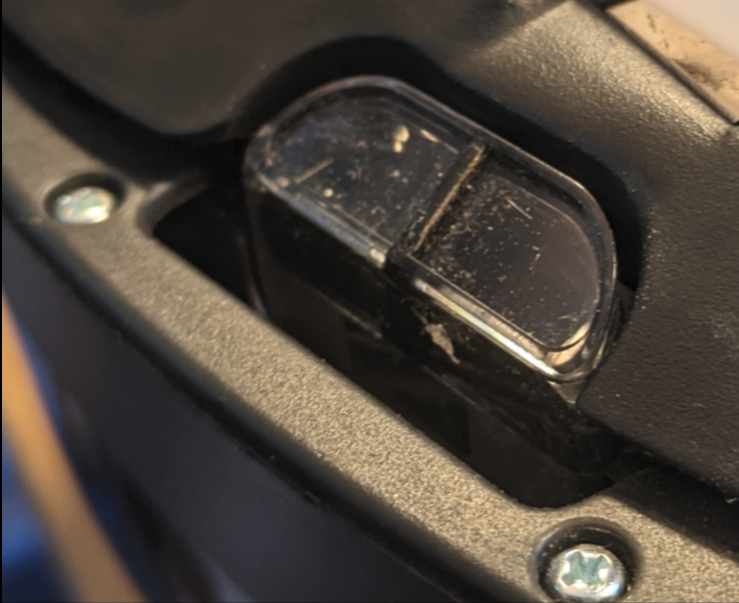
The sensors are divided in two halves, one containing the emitter and the other containing the detector. Sensibly, and obviously in retrospect, the two halves are separated by an opaque wall so that the detector is certain to receive only reflections rather than any direct “spill” from the emitter. Taping over it stopped all of the light from reaching the detector.
Hmm. So what I need is a way to get the light from the emitter to go around the divider and into the detector, fooling Roomba into thinking there is floor under it at all times.
It is at this point that I will note that our house has no cliffs. There is a stairway to the basement that has a door with spring hinges that is therefore always closed, so there is no chance Roomba can drive off of anything here.
My second attempt was to use paper. I love a little quick and dirty prototyping with some card stock and tape. I cut out a couple of squares, folded them to go around the sensor housings, and used painter’s tape to secure it such that a gap was maintained between the housing and the paper so the beam could bounce.

I placed the Roomba on the white area of the rug, facing the black area, and turned it on. It worked! It turned on and started rolling forward, stopping when one of the side sensors reached the black edge! I quickly prepared two more paper covers.
With the paper in place, Roomba happily drove all around the troublesome rug with no issues.
I left it this way for a couple of days. But something about paper… It just doesn’t satisfy. Not when you have a Prusa i3 MK2 3D printer and an abiding love for Autocad Fusion 360. I got to work.
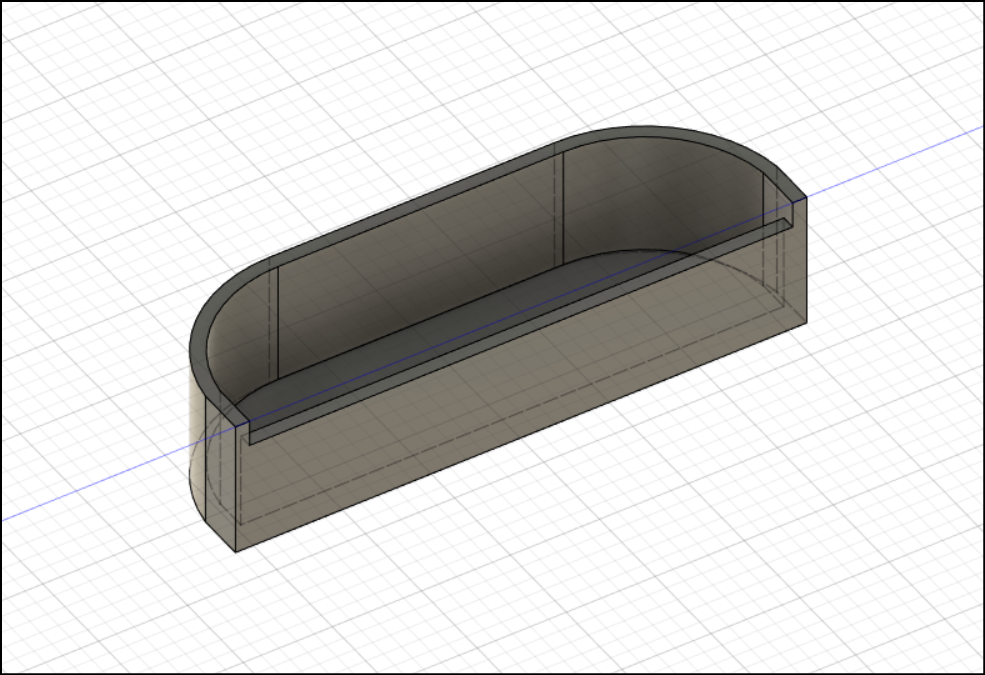
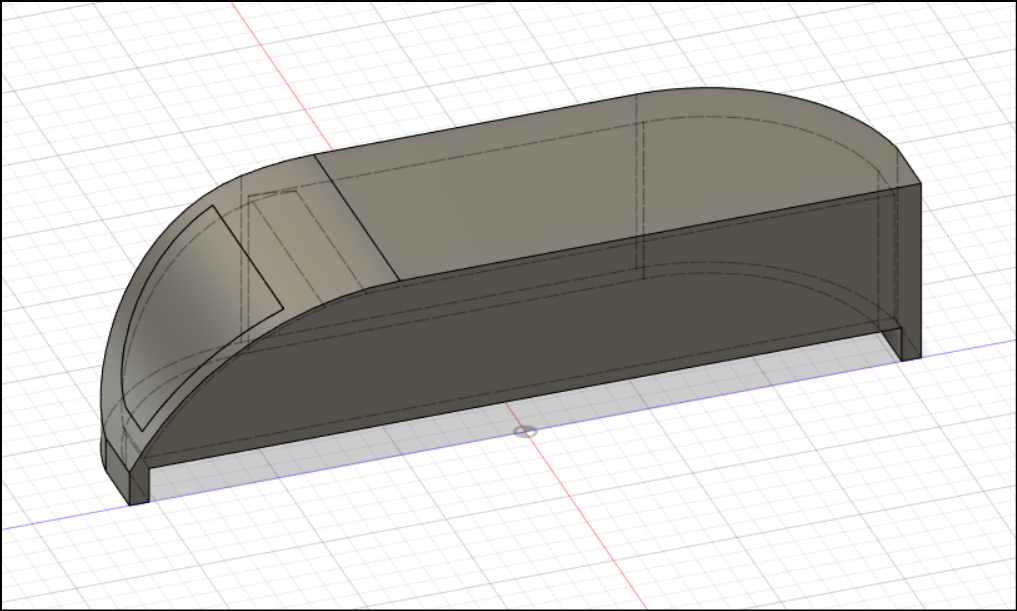
Pictured above is something like version three. I took a picture of the sensor with my phone and imported it into Fusion 360 to trace the curve, and I used my calipers to get accurate major dimensions. Surprisingly, it fit the first time, but I refined it a bit and it isn’t worth showing all the changes here.
The cap slides right over the sensor and because the sensor is angled and the cap is not, there is sufficient gap for the light beam to get from the emitter side to the detector side. Viola! Here is what it looks like in real life:
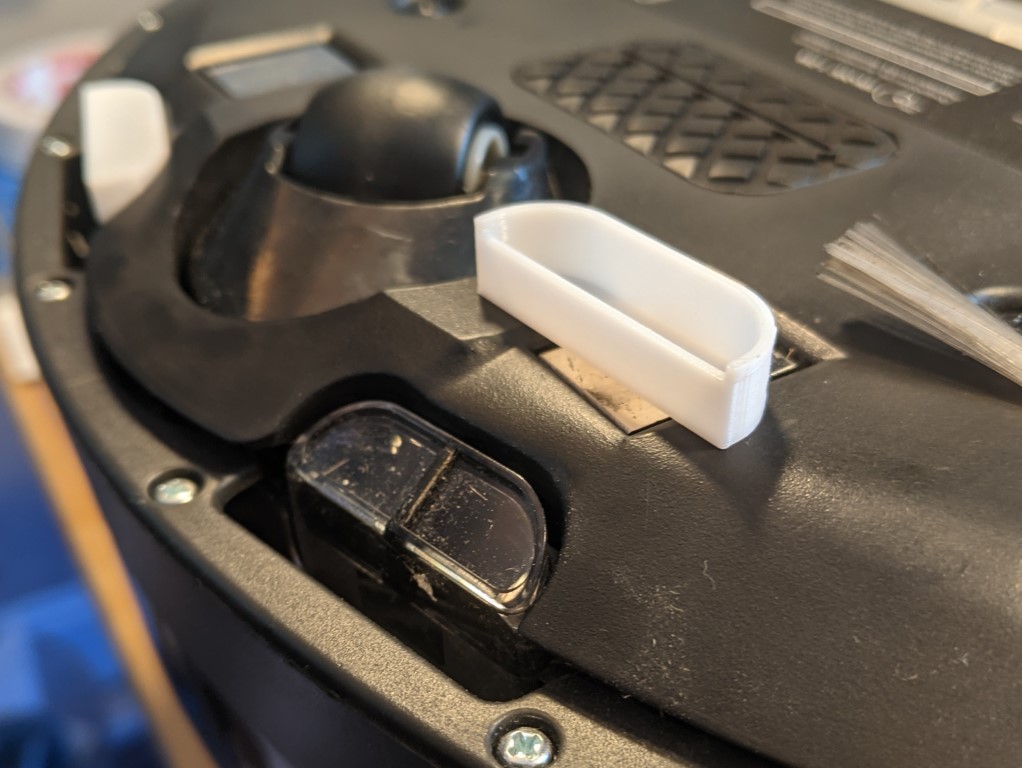
And installed:
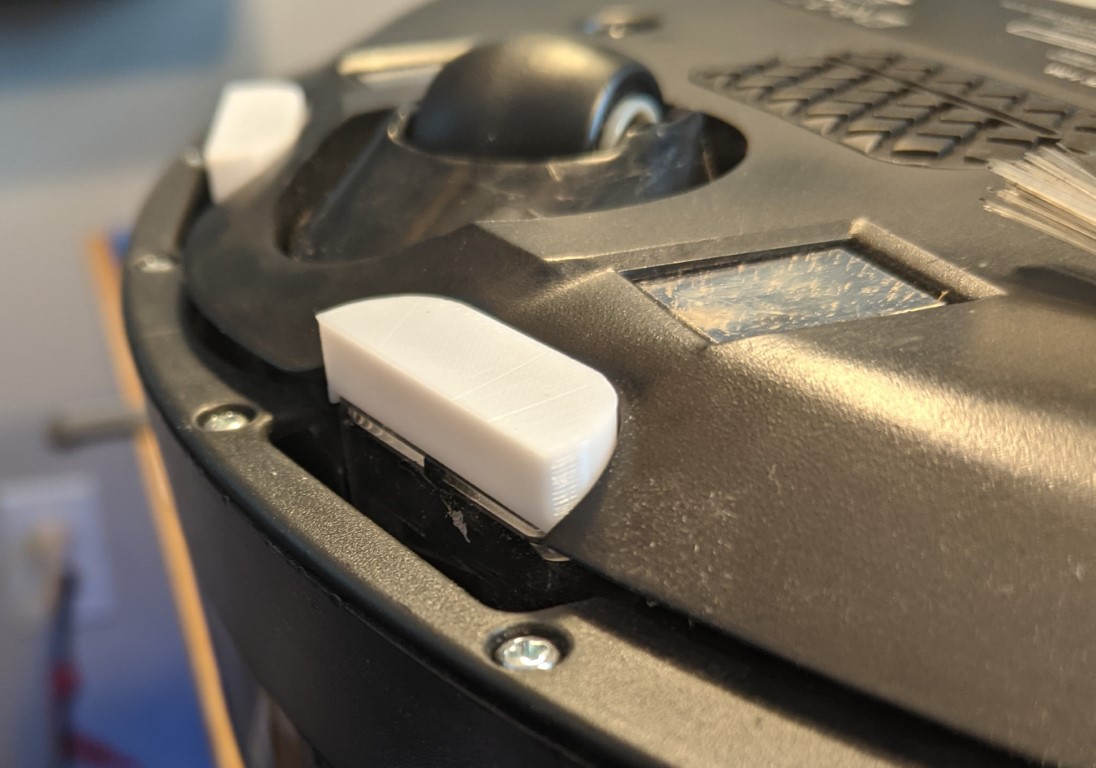
Victory!
Yes, well, almost. The “blinders,” as I’ve taken to calling them, work perfectly to keep Roomba darting around across my problematic rug, so now it only gets stuck very occasionally when it actually jams itself in some weird spot, though so far that has happened very rarely.
There are two things I didn’t account for. First, there is a spinning brush on one side that is supposed to push dirt and crumbs out from the wall so the Roomba can suck them up and the brush was hitting the blinder cap, making an awful noise.
I solved that by making a special cap for that one sensor that incorporates a curved profile on the brush side so that it only barely touches it as it passes over, and that did the trick.
Second, on the first real time out with all the blinder caps installed, Roomba got stuck on the rug and commanded me to move it. I was filled with seething rage until I realized that one of them had fallen off.
Duct tape to the rescue.
Actual victory!
So far, this is working. Should a consumer be required to engage in some light industrial design and fabrication to make this product work on a patterned surface? I should say not.
It was still fun, though.